
sipp installation on ubuntu 18.04/20.04 server from source code
Introduction:
sipp is one of the most useful tool to perform the SIP testing. We can use sipp as the UAC or UAS depending upon our need. In this article, We will see how sipp installation is performed from the source code on Ubuntu Linux.
With the help of sipp, We can also create complex test cases and see how infrastructure is behoving.
We can also generate thousands of calls to perform the stress testing of your infrastructure.
📢 This Tutorial is written for the older version of Ubuntu. But the steps will be most probably applicable for the latest version of the Ubuntu Linux as well.
Sipp Installation On Ubuntu:
Here is the step by step procedure to install the sipp sip stress testing tool.
First of all install all the necessary dependencies using the following command.
|
1 |
sudo apt-get install dh-autoreconf ncurses-dev build-essential libssl-dev libpcap-dev libncurses5-dev libsctp-dev lksctp-tools |
Then get the latest sipp tar file from the github
|
1 |
wget https://github.com/SIPp/sipp/releases/download/v3.5.1/sipp-3.5.1.tar.gz |
Extract the file using the tar command.
|
1 |
tar -zxvf sipp-3.5.1.tar.gz |
Once the untar is completed. Go to extracted folder and then run the autoconfig and configure and make to install the sipp on your system. look below for more details.
|
1 2 3 |
cd sipp-3.5.1 autoreconf -vifs ./configure --with-sctp --with-pcap --with-openssl make |
That’s it you have successfully installed the sipp on your ubuntu linux box.
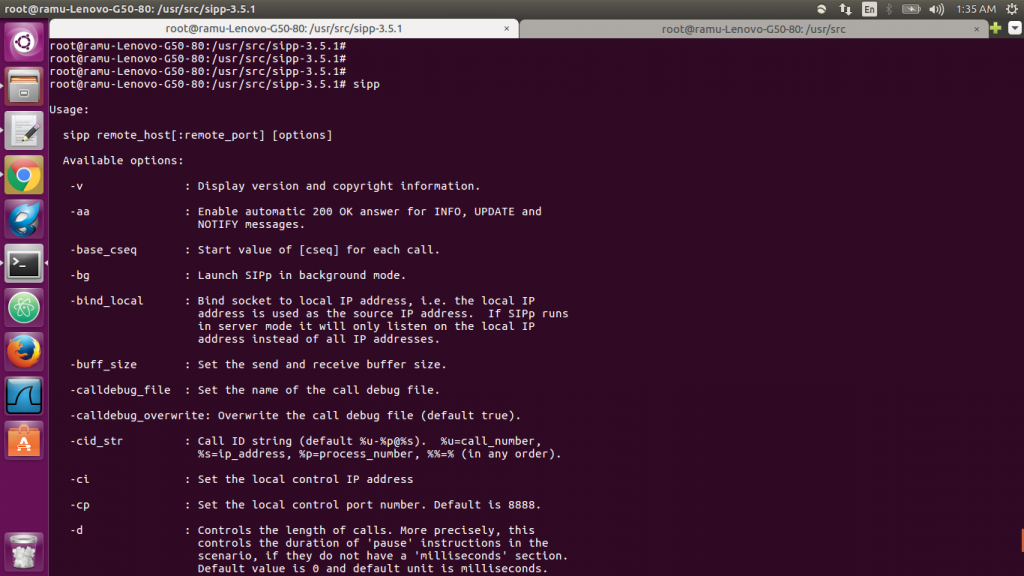
You can check your sipp installtion by running the following sipp command.
If you get the following output, Then your installation is working fine.
|
1 2 3 4 5 6 7 8 9 10 11 12 13 14 15 16 17 18 19 20 21 22 23 24 25 26 27 28 29 30 31 32 33 34 35 36 37 38 39 40 41 42 43 44 45 46 47 48 49 50 51 52 53 54 55 56 57 58 59 60 61 62 63 64 65 66 67 68 69 70 71 72 73 74 75 76 77 78 79 80 81 82 83 84 85 86 87 88 89 90 91 92 93 94 95 96 97 98 99 100 101 102 103 104 105 106 107 108 109 110 111 112 113 114 115 116 117 118 119 120 121 122 123 124 125 126 127 128 129 130 131 132 133 134 135 136 137 138 139 140 141 142 143 144 145 146 147 148 149 150 151 152 153 154 155 156 157 158 159 160 161 162 163 164 165 166 167 168 169 170 171 172 173 174 175 176 177 178 179 180 181 182 183 184 185 186 187 188 189 190 191 192 193 194 195 196 197 198 199 200 201 202 203 204 205 206 207 208 209 210 211 212 213 214 215 216 217 218 219 220 221 222 223 224 225 226 227 228 229 230 231 232 233 234 235 236 237 238 239 240 241 242 243 244 245 246 247 248 249 250 251 252 253 254 255 256 257 258 259 260 261 262 263 264 265 266 267 268 269 270 271 272 273 274 275 276 277 278 279 280 281 282 283 284 285 286 287 288 289 290 291 292 293 294 295 296 297 298 299 300 301 302 303 304 305 306 307 308 309 310 311 312 313 314 315 316 317 318 319 320 321 322 323 324 325 326 327 328 329 330 331 332 333 334 335 336 337 338 339 340 341 342 343 344 345 346 347 348 349 350 351 352 353 354 355 356 357 358 359 360 361 362 363 364 365 366 367 368 369 370 371 372 373 374 375 376 377 378 379 380 381 382 383 384 385 386 387 388 389 390 391 392 393 394 395 396 397 398 399 400 401 402 403 404 405 406 407 408 409 410 411 412 413 414 415 416 |
/usr/src/sipp-3.5.1# sipp Usage: sipp remote_host[:remote_port] [options] Available options: -v : Display version and copyright information. -aa : Enable automatic 200 OK answer for INFO, UPDATE and NOTIFY messages. -base_cseq : Start value of [cseq] for each call. -bg : Launch SIPp in background mode. -bind_local : Bind socket to local IP address, i.e. the local IP address is used as the source IP address. If SIPp runs in server mode it will only listen on the local IP address instead of all IP addresses. -buff_size : Set the send and receive buffer size. -calldebug_file : Set the name of the call debug file. -calldebug_overwrite: Overwrite the call debug file (default true). -cid_str : Call ID string (default %u-%p@%s). %u=call_number, %s=ip_address, %p=process_number, %%=% (in any order). -ci : Set the local control IP address -cp : Set the local control port number. Default is 8888. -d : Controls the length of calls. More precisely, this controls the duration of 'pause' instructions in the scenario, if they do not have a 'milliseconds' section. Default value is 0 and default unit is milliseconds. -deadcall_wait : How long the Call-ID and final status of calls should be kept to improve message and error logs (default unit is ms). -default_behaviors: Set the default behaviors that SIPp will use. Possbile values are: - all Use all default behaviors - none Use no default behaviors - bye Send byes for aborted calls - abortunexp Abort calls on unexpected messages - pingreply Reply to ping requests If a behavior is prefaced with a -, then it is turned off. Example: all,-bye -error_file : Set the name of the error log file. -error_overwrite : Overwrite the error log file (default true). -f : Set the statistics report frequency on screen. Default is 1 and default unit is seconds. -fd : Set the statistics dump log report frequency. Default is 60 and default unit is seconds. -i : Set the local IP address for 'Contact:','Via:', and 'From:' headers. Default is primary host IP address. -inf : Inject values from an external CSV file during calls into the scenarios. First line of this file say whether the data is to be read in sequence (SEQUENTIAL), random (RANDOM), or user (USER) order. Each line corresponds to one call and has one or more ';' delimited data fields. Those fields can be referred as [field0], [field1], ... in the xml scenario file. Several CSV files can be used simultaneously (syntax: -inf f1.csv -inf f2.csv ...) -infindex : file field Create an index of file using field. For example -inf users.csv -infindex users.csv 0 creates an index on the first key. -ip_field : Set which field from the injection file contains the IP address from which the client will send its messages. If this option is omitted and the '-t ui' option is present, then field 0 is assumed. Use this option together with '-t ui' -l : Set the maximum number of simultaneous calls. Once this limit is reached, traffic is decreased until the number of open calls goes down. Default: (3 * call_duration (s) * rate). -log_file : Set the name of the log actions log file. -log_overwrite : Overwrite the log actions log file (default true). -lost : Set the number of packets to lose by default (scenario specifications override this value). -rtcheck : Select the retransmisison detection method: full (default) or loose. -m : Stop the test and exit when 'calls' calls are processed -mi : Set the local media IP address (default: local primary host IP address) -master : 3pcc extended mode: indicates the master number -max_recv_loops : Set the maximum number of messages received read per cycle. Increase this value for high traffic level. The default value is 1000. -max_sched_loops : Set the maximum number of calsl run per event loop. Increase this value for high traffic level. The default value is 1000. -max_reconnect : Set the the maximum number of reconnection. -max_retrans : Maximum number of UDP retransmissions before call ends on timeout. Default is 5 for INVITE transactions and 7 for others. -max_invite_retrans: Maximum number of UDP retransmissions for invite transactions before call ends on timeout. -max_non_invite_retrans: Maximum number of UDP retransmissions for non-invite transactions before call ends on timeout. -max_log_size : What is the limit for error and message log file sizes. -max_socket : Set the max number of sockets to open simultaneously. This option is significant if you use one socket per call. Once this limit is reached, traffic is distributed over the sockets already opened. Default value is 50000 -mb : Set the RTP echo buffer size (default: 2048). -message_file : Set the name of the message log file. -message_overwrite: Overwrite the message log file (default true). -mp : Set the local RTP echo port number. Default is 6000. -nd : No Default. Disable all default behavior of SIPp which are the following: - On UDP retransmission timeout, abort the call by sending a BYE or a CANCEL - On receive timeout with no ontimeout attribute, abort the call by sending a BYE or a CANCEL - On unexpected BYE send a 200 OK and close the call - On unexpected CANCEL send a 200 OK and close the call - On unexpected PING send a 200 OK and continue the call - On any other unexpected message, abort the call by sending a BYE or a CANCEL -nr : Disable retransmission in UDP mode. -nostdin : Disable stdin. -p : Set the local port number. Default is a random free port chosen by the system. -pause_msg_ign : Ignore the messages received during a pause defined in the scenario -periodic_rtd : Reset response time partition counters each logging interval. -plugin : Load a plugin. -r : Set the call rate (in calls per seconds). This value can bechanged during test by pressing '+','_','*' or '/'. Default is 10. pressing '+' key to increase call rate by 1 * rate_scale, pressing '-' key to decrease call rate by 1 * rate_scale, pressing '*' key to increase call rate by 10 * rate_scale, pressing '/' key to decrease call rate by 10 * rate_scale. If the -rp option is used, the call rate is calculated with the period in ms given by the user. -rp : Specify the rate period for the call rate. Default is 1 second and default unit is milliseconds. This allows you to have n calls every m milliseconds (by using -r n -rp m). Example: -r 7 -rp 2000 ==> 7 calls every 2 seconds. -r 10 -rp 5s => 10 calls every 5 seconds. -rate_scale : Control the units for the '+', '-', '*', and '/' keys. -rate_increase : Specify the rate increase every -fd units (default is seconds). This allows you to increase the load for each independent logging period. Example: -rate_increase 10 -fd 10s ==> increase calls by 10 every 10 seconds. -rate_max : If -rate_increase is set, then quit after the rate reaches this value. Example: -rate_increase 10 -rate_max 100 ==> increase calls by 10 until 100 cps is hit. -no_rate_quit : If -rate_increase is set, do not quit after the rate reaches -rate_max. -recv_timeout : Global receive timeout. Default unit is milliseconds. If the expected message is not received, the call times out and is aborted. -send_timeout : Global send timeout. Default unit is milliseconds. If a message is not sent (due to congestion), the call times out and is aborted. -sleep : How long to sleep for at startup. Default unit is seconds. -reconnect_close : Should calls be closed on reconnect? -reconnect_sleep : How long (in milliseconds) to sleep between the close and reconnect? -ringbuffer_files: How many error/message files should be kept after rotation? -ringbuffer_size : How large should error/message files be before they get rotated? -rsa : Set the remote sending address to host:port for sending the messages. -rtp_echo : Enable RTP echo. RTP/UDP packets received on port defined by -mp are echoed to their sender. RTP/UDP packets coming on this port + 2 are also echoed to their sender (used for sound and video echo). -rtt_freq : freq is mandatory. Dump response times every freq calls in the log file defined by -trace_rtt. Default value is 200. -s : Set the username part of the resquest URI. Default is 'service'. -sd : Dumps a default scenario (embeded in the sipp executable) -sf : Loads an alternate xml scenario file. To learn more about XML scenario syntax, use the -sd option to dump embedded scenarios. They contain all the necessary help. -shortmessage_file: Set the name of the short message log file. -shortmessage_overwrite: Overwrite the short message log file (default true). -oocsf : Load out-of-call scenario. -oocsn : Load out-of-call scenario. -skip_rlimit : Do not perform rlimit tuning of file descriptor limits. Default: false. -slave : 3pcc extended mode: indicates the slave number -slave_cfg : 3pcc extended mode: indicates the file where the master and slave addresses are stored -sn : Use a default scenario (embedded in the sipp executable). If this option is omitted, the Standard SipStone UAC scenario is loaded. Available values in this version: - 'uac' : Standard SipStone UAC (default). - 'uas' : Simple UAS responder. - 'regexp' : Standard SipStone UAC - with regexp and variables. - 'branchc' : Branching and conditional branching in scenarios - client. - 'branchs' : Branching and conditional branching in scenarios - server. Default 3pcc scenarios (see -3pcc option): - '3pcc-C-A' : Controller A side (must be started after all other 3pcc scenarios) - '3pcc-C-B' : Controller B side. - '3pcc-A' : A side. - '3pcc-B' : B side. -stat_delimiter : Set the delimiter for the statistics file -stf : Set the file name to use to dump statistics -t : Set the transport mode: - u1: UDP with one socket (default), - un: UDP with one socket per call, - ui: UDP with one socket per IP address The IP addresses must be defined in the injection file. - t1: TCP with one socket, - tn: TCP with one socket per call, - l1: TLS with one socket, - ln: TLS with one socket per call, - c1: u1 + compression (only if compression plugin loaded), - cn: un + compression (only if compression plugin loaded). This plugin is not provided with sipp. -timeout : Global timeout. Default unit is seconds. If this option is set, SIPp quits after nb units (-timeout 20s quits after 20 seconds). -timeout_error : SIPp fails if the global timeout is reached is set (-timeout option required). -timer_resol : Set the timer resolution. Default unit is milliseconds. This option has an impact on timers precision.Small values allow more precise scheduling but impacts CPU usage.If the compression is on, the value is set to 50ms. The default value is 10ms. -T2 : Global T2-timer in milli seconds -sendbuffer_warn : Produce warnings instead of errors on SendBuffer failures. -trace_msg : Displays sent and received SIP messages in <scenario file name>_<pid>_messages.log -trace_shortmsg : Displays sent and received SIP messages as CSV in <scenario file name>_<pid>_shortmessages.log -trace_screen : Dump statistic screens in the <scenario_name>_<pid>_screens.log file when quitting SIPp. Useful to get a final status report in background mode (-bg option). -trace_err : Trace all unexpected messages in <scenario file name>_<pid>_errors.log. -trace_calldebug : Dumps debugging information about aborted calls to <scenario_name>_<pid>_calldebug.log file. -trace_stat : Dumps all statistics in <scenario_name>_<pid>.csv file. Use the '-h stat' option for a detailed description of the statistics file content. -trace_counts : Dumps individual message counts in a CSV file. -trace_rtt : Allow tracing of all response times in <scenario file name>_<pid>_rtt.csv. -trace_logs : Allow tracing of <log> actions in <scenario file name>_<pid>_logs.log. -users : Instead of starting calls at a fixed rate, begin 'users' calls at startup, and keep the number of calls constant. -watchdog_interval: Set gap between watchdog timer firings. Default is 400. -watchdog_reset : If the watchdog timer has not fired in more than this time period, then reset the max triggers counters. Default is 10 minutes. -watchdog_minor_threshold: If it has been longer than this period between watchdog executions count a minor trip. Default is 500. -watchdog_major_threshold: If it has been longer than this period between watchdog executions count a major trip. Default is 3000. -watchdog_major_maxtriggers: How many times the major watchdog timer can be tripped before the test is terminated. Default is 10. -watchdog_minor_maxtriggers: How many times the minor watchdog timer can be tripped before the test is terminated. Default is 120. -3pcc : Launch the tool in 3pcc mode ("Third Party call control"). The passed ip address is depending on the 3PCC role. - When the first twin command is 'sendCmd' then this is the address of the remote twin socket. SIPp will try to connect to this address:port to send the twin command (This instance must be started after all other 3PCC scenarii). Example: 3PCC-C-A scenario. - When the first twin command is 'recvCmd' then this is the address of the local twin socket. SIPp will open this address:port to listen for twin command. Example: 3PCC-C-B scenario. -tdmmap : Generate and handle a table of TDM circuits. A circuit must be available for the call to be placed. Format: -tdmmap {0-3}{99}{5-8}{1-31} -key : keyword value Set the generic parameter named "keyword" to "value". -set : variable value Set the global variable parameter named "variable" to "value". -dynamicStart : variable value Set the start offset of dynamic_id varaiable -dynamicMax : variable value Set the maximum of dynamic_id variable -dynamicStep : variable value Set the increment of dynamic_id variable |